You have a good photo. You want it to move: the hair to catch the wind, the camera to drift closer, the coffee to steam. An AI video generator from images does exactly that, and in 2026 almost every major tool has a photo-first mode, each with its own rules for what you can upload and how long the clip runs.
Why Photo-First AI Video Is the Easiest Way In
Starting from an image is the most predictable way to use an AI video generator, because the photo fixes the subject, colors, lighting and framing before the model adds a single frame. Runway’s Image to Video Prompting Guide says the input image “defines composition, subject matter, lighting, and style,” so your prompt only has to describe motion (Runway Help Center).
That makes image-to-video a good first step for creators who already shoot products, portraits or travel photos. Why write a 200-word scene description when the picture already says it?
This guide covers the official image-to-video features of Kling, Runway, Google Veo, Gemini and Canva, plus Adobe Firefly’s free video allowance, read from each vendor’s own pages on October 24, 2026. We did not generate AI clips for this article, so you won’t find quality scores here. What you will find: what each tool accepts, how long the clips run, what the free tiers allow, and how a plain photo slideshow from our own Movavi test differs from AI motion.
Key Takeaways
Kling’s image-to-video page claims more than 600 million AI videos generated on its platform, a vendor figure rather than an independent count (Kling AI). Most tools now take a start frame, many take an end frame too, and clip length runs from Canva’s fixed 5 seconds to 30 seconds on Kling 4.0. Free options exist, but each one has a catch.
Quick Answer: The Easiest Ways to Turn a Photo Into a Video With AI
The easiest free way to turn a photo into a video with AI is Canva’s Image to Video, which Canva Free users can run “as long as you still have monthly AI allowance available” and which always makes a 5-second clip (Canva Help Center). For more control, length or several photos at once, the right pick depends on your goal.
| Your goal | Start with | Why, per the vendor’s own docs |
|---|---|---|
| A quick, simple animation inside a design | Canva Image to Video | Fixed 5-second clip, Smart or Custom motion, works on Canva Free while your AI allowance lasts |
| Control over where the clip starts and ends | Google Flow Frames or Kling Start and End Frames | Both take a start image and an end image and animate the path between them |
| The longest clip from one photo | Kling 4.0 | Clips from 3 to 30 seconds with the full model |
| A vertical clip for Shorts or Reels | Runway Gen-4.5 image-to-video | Image input adds 9:16 and four other shapes; text-only input is 16:9 |
| Several photos in one consistent clip | Gemini app or Kling Omni Reference | Gemini takes up to 5 images; Kling 4.0 takes up to 15 reference assets |
| A slideshow of photos with narration, no AI motion | A regular video editor | Our Movavi export put one image and a voiceover into a 15.5-second video |
Is one tool the best AI video generator from image for everyone? No. The table sorts by job, and the sections below explain each row. If your project is not photo-based at all, start with which AI video tool suits each kind of project.
How Image-to-Video AI Works: Start Frames, End Frames and Motion Prompts
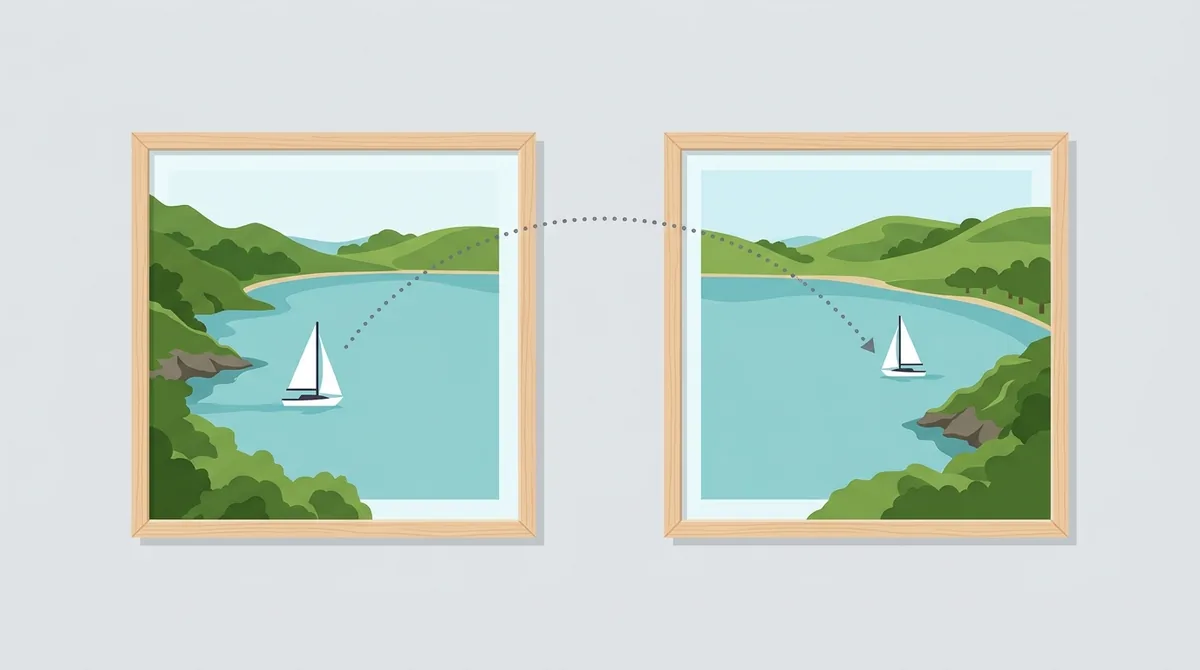
Image-to-video AI treats your photo as frame one of the clip and invents every frame after it, guided by a text prompt about motion. Runway puts it plainly: “Your input image acts as the first frame” (Runway Image to Video Prompting Guide). Google’s Gemini API documentation adds a second mode, first and last frame interpolation, where the model animates “from the first frame to the ending frame” (Gemini API, Omni Flash).
There are four controls you will meet again and again:
- Start frame. One photo, the first frame of the clip. This is the basic image-to-video mode, and every image-to-video tool in this guide offers it.
- End frame. A second photo the clip must land on. Kling, Google Flow and the Gemini API document it; tool vendors also call it keyframes or interpolation.
- References (ingredients, elements). Photos the model should keep consistent, such as a character’s face or a product, without using them as literal frames.
- Motion prompt. Text that describes what moves, how the camera moves and in what order.
The difference between a start frame and a reference matters more than it sounds. Google’s Omni Flash guide suggests telling the model, “The images should not be used as literal initial frames,” when you only want references (Gemini API). It also notes a neat trick: use the same image as first and last frame to make a video that loops.
So what does a keyframes search really ask for? Usually it means start and end frames, and Kling 4.0 now goes further with up to 10 keyframes in supported modes. For the bigger picture of text, image and video inputs, see how text-to-video and the other AI video modes differ.
Image-to-Video in Kling: Start and End Frames, References and Motion Control
Kling’s image-to-video page says one image is enough and that “the full Kling 4.0 model supports video generation from 3 to 30 seconds per clip,” while Kling 3.0 tops out at 15 seconds (Kling AI, Image to Video). That makes Kling the longest single-clip option among the tools in this guide.
Here is what Kling documents for photo-based clips:
- Start and End Frames. Upload two images and Kling generates the transition between them. You turn it on with “Add End Frame” at the top right of the Image to Video panel (Kling Start and End Frames guide). The guide warns that the two images “should be as similar as possible,” because big differences can trigger a shot switch.
- Keyframes and Omni Reference. Kling 4.0 lists up to 10 flexible keyframes and an Omni Reference feature that takes up to 15 combined reference assets, including images, videos and subjects.
- Elements. The VIDEO 3.0 guide describes binding a subject so a character stays stable as the camera moves; you build an element from 2 to 4 reference images or from a video (Kling VIDEO 3.0 guide).
- Native audio. The same guide lists native audio with dialogue in Chinese, English, Japanese, Korean and Spanish. If you searched for an AI video generator from image and audio, this is the closest match: the sound comes out of the same generation.
What about the photo dance AI video generator searches? Kling’s answer is Motion Control. You upload “a static character image and a motion reference video,” and Kling copies the movement onto your character (Kling Motion Control). Kling’s Motion Brush guide offers finer control: brush an area of the photo, draw a path, and set up to six elements moving at once, with a static brush to pin parts of the frame (Kling Motion Brush guide).
On the free side, Kling’s FAQ says “Some advanced models, higher resolutions, and watermark-free downloads may require a paid plan.” Commercial use falls under paid membership terms. This guide doesn’t quote Kling prices; check the membership page for the current offer before you subscribe.
Image-to-Video in Runway: Gen-4.5 and Gen-4 Turbo
Runway’s Gen-4.5 turns an image into a 2- to 10-second clip at 720p for 12 credits per second, on the Standard plan or higher (Runway Help Center, Creating with Gen-4.5). The biggest reason to start from a photo in Runway is shape: text-to-video in Gen-4.5 outputs only 16:9, while image-to-video adds 9:16, 1:1, 4:3, 3:4 and 21:9.
By default, the aspect ratio follows your input image. If you choose a different one, Runway crops the photo. Need a vertical clip? Shoot or crop the photo vertically first, and nothing important gets cut.
The older Gen-4 and Gen-4 Turbo models are image-only. The help center says an input image “is required on both Gen-4 models” and “acts as the first frame of your output video” (Creating with Gen-4 Video). Turbo costs 5 credits per second, so a 5-second draft uses 25 credits. Runway’s own advice: test ideas in Turbo, then switch to Gen-4 if the draft falls short. The same page now points keyframe work to a separate Animate Frames app.
Want a clip longer than 10 seconds from one photo? Runway’s prompting guide describes chaining: move the scrubber to the last frame, choose Use, then Use current frame, and generate a new clip from it. You then join the two clips in an editor and trim the shared frame.
The free plan gives 125 one-time credits, a Runway watermark on every video, and “access to a limited set of generative AI tools,” per the help center (Runway Free plan details). Gen-4.5 itself needs Standard. For the dollar side, see Runway’s per-second credit costs and plan prices.
Frames and Ingredients in Google Veo and Gemini Omni
Google Flow animates photos two ways, Frames and Ingredients, and its help page says frames let you “create transitions, animate images, or generate a video that starts and ends with specific images” (Google Flow Help). In Flow, you click the model name, choose Video, then Frames, and drag images onto “+ Add start frame” and “+ Add end frame.”
Which models support what? Flow’s model page lists this, as of October 24, 2026 (Flow models and supported features):
| Model in Flow | Start frame | Start and end frame | Ingredients (references) | Clip lengths |
|---|---|---|---|---|
| Veo 3.1 Lite | Yes | Yes | Yes, 8 seconds only | 4, 6 or 8 seconds |
| Veo 3.1 Fast | Yes | Yes | Yes, 8 seconds only | 4, 6 or 8 seconds |
| Veo 3.1 Quality | Yes | Yes | No | 4, 6 or 8 seconds |
| Gemini Omni Flash 1.1 | Yes | Yes | Yes | 4, 6, 8 or 10 seconds |
Ingredients are how Flow handles an AI video generator with multiple images: you add photos of a character, an object or a place, and the model keeps them consistent across clips. Flow’s tip is to “provide subject or product references on a plain or segmented background.” Ingredients are also the only way to add voice references on Omni Flash.
In the Gemini app, video now runs on Gemini Omni. You can “upload one video and up to 5 images,” and when you upload a reference image the aspect ratio matches it (Gemini Apps Help). The catch: a personal account needs a Google AI plan, and the feature isn’t available to users under 18.
For developers, Google Cloud’s Veo 3.1 page lists text to video, image to video and “from first and last frame” as supported, with a 20 MB cap on the input image and 8-second clips for reference-image video (Google Cloud, Veo 3.1). The Veo 3.1 Preview models in the Gemini API shut down on October 22, 2026, per Google’s video docs (Gemini API, video generation).
One more date explains why vertical photo clips got easier. On January 13, 2026, TechCrunch reported that Google updated Veo 3.1 so reference images could produce native 9:16 video, with better character expressions “even if your prompts are shorter” (TechCrunch). To compare Veo’s three tiers and what each plan includes, read how Veo 3.1’s tiers and Flow credits compare.
Canva and Adobe Firefly: Image-to-Video in Design Tools
Canva’s Image to Video “only supports 5-second video clips,” adds no audio, and keeps your image’s original aspect ratio, per its help center (Canva Help Center). It is the simplest image to AI video generator in this guide, and it lives where many creators already make their graphics. Why open a separate app for a 5-second social clip?
The steps are short. Select an image in your design, choose Edit, then Image to Video under Tools. Pick Smart mode for default motion, or Custom to describe it; Canva’s own example prompt is “make the image dance.” The clip drops into your design, and you can add music from Canva’s audio library afterward.
Canva lists the limits openly:
- Faces are not fully supported: “facial motion may not render as expected.”
- Premium stock media doesn’t work, and neither do images with transparent backgrounds.
- Some generations come out as 3-second clips instead of 5.
- It is off by default for Canva Education student accounts.
Canva also has AI Effects, a template-based option on the homepage. It takes one image per video, outputs vertical clips, doesn’t accept custom prompts, and allows up to seven videos every 30 minutes. For Canva’s text-prompt clips and plan limits, see everything Canva’s AI video tools can do on each plan.
Adobe Firefly sits in the same design-tool camp. Its plans page says you can get “free daily generations across image, video, and audio” without a plan, and paid plans list up to 20, 40 or 100 five-second videos a month (Adobe Firefly plans). Adobe also says it “automatically attaches Content Credentials” to Firefly outputs. Want to animate a photo in Firefly specifically? Check Firefly’s help center for the current image-to-video steps and models before you plan a project around them.
Free Image-to-Video Options and Their Limits
A free AI video generator from image does exist, but every free path we found comes with a cap, a watermark rule or an account requirement. Google Flow, for example, gives “50 Google Flow credits per day” to people without a subscription, and a Veo 3.1 Lite generation costs 10 of them (Google Flow credits).
| Tool | Free path for photo-to-video | The catch, per the vendor |
|---|---|---|
| Canva | Image to Video on Canva Free | Uses the monthly AI allowance; Canva Free gets up to 20 uses of Standard or Premium AI tools |
| Google Flow | 50 credits per day; Veo 3.1 Lite costs 10 per generation | Peak-hour limits from roughly 2 PM to 5 PM UTC; Flow’s get-started page lists a Google AI plan as a requirement |
| Kling | Free options for eligible users | Watermark-free downloads and higher resolutions may need a paid plan |
| Runway | 125 one-time credits | Watermark on every free video; limited set of models |
| Adobe Firefly | Free daily generations across image, video and audio | No daily number published on the plans page |
| Gemini app | None | Video needs a Google AI plan on personal accounts |
Two Google pages disagree here. Flow’s credits page describes the 50 daily credits for non-subscribers, while its get-started page says you must “be subscribed to Google AI Plus, Google AI Pro, or Google AI Ultra” (Get started with Google Flow). Open Flow with your own account and check the credit counter under your profile picture before you count on it.
Is there an AI video generator from image with no sign up? Not among the official tools here. Gemini says you must be signed in, Flow tracks credits per account, and Canva’s and Runway’s free allowances come with a Canva Free or Runway Free plan, which means an account. What about a free AI video generator from image without watermark? Runway and Kling both reserve watermark-free downloads for paid plans. For Canva, Flow and Firefly, make one test clip and check the download before you plan around a clean result. For a credit-by-credit view, see free AI video plans compared side by side.
Photo Slideshow Editor or AI Image-to-Video? What Our Movavi Export Showed
Photo to video editing software and an AI image-to-video tool solve different problems: an editor arranges your photos on a timeline, while AI invents new frames. In our own test of Movavi Video Editor’s free version on October 21, 2026, one image plus a voiceover became a 15.5-second, 1920x1080 MP4 with a watermark in the lower-left corner.
Here is what we did. We imported a title card image and a voiceover of a 20-second script, made with macOS text-to-speech. The image ended up on the video track as two clips, 8 seconds in total, with the narration on the audio track. Nothing about it needed a prompt or credits.
The export is where the free version showed its limits. Before saving, Movavi showed an upgrade screen that listed “Watermark on saved videos · 60-second export limit on videos · Low-quality saved videos · Key features locked,” and the free path was a button called “Save with Limitations.” The file we got was 846 KB, H.264 at 1920x1080, with a video bitrate of about 108 kbps. The resolution held; the bitrate was very low.
What surprised us was how different the two jobs feel. In the editor, every bit of movement you see is something you placed: a cut, a transition, a pan you set by hand. With an AI video generator from photo input, you place nothing; you describe motion and the model draws it. If your goal is a memorial slideshow, a product carousel or narrated photos for YouTube, an editor is cheaper and fully predictable. If you want the photo itself to come alive, you need AI.
So which one do you need? Many creators will use both: generate short AI clips from their best photos, then assemble them with music and narration in an editor. For more on this kind of workflow, see what else our Movavi free-version test turned up and free editors that can turn your photos into a slideshow.
Preparing Your Photo: Resolution, Aspect Ratio and Subject
The photo you upload sets a ceiling on the clip you get. Runway’s prompting guide warns that “Visual artifacts, such as blurry hands or faces, may be intensified once your image is transformed into a video” (Runway Help Center). Fix the photo before you spend credits on it. Why pay to animate a flaw?
Each tool publishes different input rules:
| Tool | File and size rules | Aspect ratio |
|---|---|---|
| Kling VIDEO 3.0 Omni (API) | JPG, JPEG or PNG; up to 50 MB; width and height at least 300 px | Between 1:2.5 and 2.5:1 |
| Google Veo 3.1 (Google Cloud) | Input image up to 20 MB; 720p or 1080p input | Output 16:9 or 9:16 |
| Runway Gen-4.5 | Image dropped into the prompt window | Follows the image by default; other ratios crop it |
| Canva Image to Video | At least 256 × 224 pixels; no transparent background | Up to 5:1; output keeps the original ratio |
| Gemini app | Up to 5 images per video | Matches the uploaded image |
Kling’s API reference adds one rule worth knowing even in the app: a first frame is required, the last frame is optional, and “last-frame-only video generation is not supported” (Kling API, Image to Video).
A short checklist before you upload:
- Crop to the shape you will publish in. A vertical photo makes a vertical clip without surprise cropping.
- Use the sharpest version you have. Blur and compression get worse in motion, not better.
- Watch for implied motion. Runway notes that motion blur, dust clouds or mid-action poses push the model toward movement, and asking for the opposite takes more tries.
- For references, use clean backgrounds. Flow recommends subjects “on a plain or segmented background.”
- For start and end frames, keep the two photos close. Kling’s guide says large differences may cause a cut.
Writing Motion Prompts for Image-to-Video
A good image-to-video prompt describes motion, not the picture. Runway’s guide says “Effective image to video prompts focus almost exclusively on motion,” and suggests this structure: “The camera [motion description] as the subject [action]. [Additional descriptions]” (Runway Image to Video Prompting Guide).
Runway breaks motion into five parts you can mix: subject action, environmental motion, camera motion, motion style and timing, and direction and speed. You don’t need all five. Start with the one that matters most, then add detail.
Here is how that looks in practice, using a photo of someone holding a mug on a porch:
- Weak: “Make it move.”
- Better: “The camera slowly pushes in as the woman lifts the mug. Steam rises. Leaves drift past in a light breeze.”
- With timing: “[00:01] She lifts the mug. [00:03] She smiles toward the camera. Continuous, seamless shot.”
Google’s Omni Flash docs back up the first point: “Vague prompts like ‘make it move’ produce less compelling results than detailed descriptions of the camera movement, subject motion, and environmental effects” (Gemini API). The same page recommends high-resolution images for image-to-video.
A few more rules from the vendors’ own guides:
- Don’t contradict the photo. Flow’s advice: “Your text prompt should complement, not contradict, your visual inputs.”
- Fight unwanted cuts with time. Runway suggests a longer duration first, then adding “Continuous, seamless shot.”
- Ask for stillness explicitly. For a calm shot, Runway offers lines such as “The locked-off camera remains perfectly still.”
- Name the element and the motion. Kling’s Motion Brush guide asks for an “element + motion” prompt, for example “a puppy running on the road.”
Does an AI video generator image prompt need to be long? No. Runway says omitting parts “grants the model creative freedom.” Short prompts are a fine first draft; add detail only where the result goes wrong.
Photos of Real People: Consent, Policies and Watermarks
Animating a photo of another person without permission breaks the rules of Runway, Google and Kling. Runway’s Usage Policy prohibits “Use of an image, video, or audio of another person without their permission” (Runway Usage Policy), and Gemini Apps Help says “You must have rights to any images that you upload” (Gemini Apps Help).
The other vendors say the same thing in their own words:
- Kling’s Terms of Service make you warrant that you hold the rights to your input and that your use won’t infringe others’ rights, including “personality rights” (Kling Terms of Service).
- Google’s Omni Flash API lists two hard limits: “Uploading and editing images containing certain recognizable people is not supported,” and images of minors can’t be uploaded or edited in the EEA, Switzerland and the UK.
- Runway’s moderation scans inputs and outputs, and the help center says content moderation “cannot be disabled” for an account, project or topic (Runway Help Center).
- Canva doesn’t forbid faces, but warns that face animation isn’t fully supported.
So what is safe? Your own photos, photos of people who agreed, and product or landscape shots you own. For anything commercial that shows a person, get written permission first; rules on using someone’s likeness differ by state and country.
Watermarks are the other half of the story. Google says all videos from the Omni Flash API include SynthID, an invisible watermark that software can detect. Google Cloud’s Veo 3.1 page lists Content Credentials (C2PA) as supported, and Adobe attaches Content Credentials to Firefly outputs. Visible watermarks are a plan question: Runway’s free videos always carry one, and Kling ties watermark-free downloads to paid plans. If you want to make these clips on your phone instead, our guide to image-to-video apps for iPhone and Android covers the mobile side.
Before You Animate Your First Photo: Your Next Step
Pick one photo you own and run it through a free option first: Canva’s 5-second Image to Video or Flow’s 50 daily credits cost nothing to try. One test tells you more about your photo than any spec sheet. Does the motion look natural, or does the face drift? You’ll know in a minute.

A short checklist to take with you:
- Do you need more than one photo in the clip? Use Kling’s references or Gemini’s 5-image upload.
- Do you need a vertical clip? Start from a vertical photo, and use Runway or Veo image-to-video.
- Do you need narration and a sequence of photos rather than motion? Use an editor.
- Does the photo show a real person? Make sure you have their permission before you upload.
Whatever you pick, keep the original photo. It is your first frame today and your fallback if the clip doesn’t work.
References
- Kling AI: Image to Video
- Kling AI: Start and End Frames guide
- Kling AI: VIDEO 3.0 Model User Guide
- Kling AI: Motion Control
- Kling AI: How to Animate Image Parts (Motion Brush)
- Kling AI API: VIDEO 3.0 Omni Image to Video
- Kling AI: Terms of Service
- Runway Help Center: Image to Video Prompting Guide
- Runway Help Center: Creating with Gen-4.5
- Runway Help Center: Creating with Gen-4 Video
- Runway Help Center: Free plan details
- Runway Help Center: Why is my input getting content moderated?
- Runway: Usage Policy
- Google Flow Help: Create videos in Google Flow
- Google Flow Help: Learn about Google Flow models and supported features
- Google Flow Help: Manage your Google Flow credits
- Google Flow Help: Get started with Google Flow
- Gemini Apps Help: Generate videos with Gemini Apps
- Gemini API: Generate and edit videos with Gemini Omni Flash
- Gemini API: Video generation in the Gemini API
- Google Cloud: Veo 3.1
- TechCrunch: Google’s update for Veo 3.1 lets users create vertical videos through reference images
- Canva Help Center: Transform your image into a video
- Canva Help Center: Understanding your AI usage
- Adobe: Compare Firefly plans