Most advice on building email lists starts with growth hacks. Yours should start with something duller: a form that works, a confirmation email that arrives, and a sending domain that inboxes trust. We built forms and welcome emails on beehiiv, Kit and MailerLite on the same day, and the hard parts were not the ones the hacks talk about: one of the three would not let a form go live until the sending domain was verified.
Building an Email List From Scratch: Where to Start
Building an email list from scratch takes one free account, one signup form and one confirmation step, and you can get your first subscriber the same day: on October 20, 2026, our own test signups reached our inbox on beehiiv and Kit that same day. Everything after that is about getting the right people to that form.
So what is email list building, exactly? It is the work of collecting email addresses from people who asked to hear from you, and keeping that list healthy enough that your emails still reach them. The asking part matters most. A list of strangers is not a list you built; it is a list you rented trouble from.
Why bother when social media is free? Because you don’t own your followers. A platform can change its feed, and your reach changes with it. An email address keeps working when an algorithm doesn’t, and it is the asset you can move from one tool to another. Once the list exists, it can also pay for itself; our guide to turning a newsletter audience into income covers the ways lists make money.

This guide follows the order we would use for a brand-new list:
- Pick an email tool with a free plan that fits.
- Create a signup form and put it on your site.
- Turn on double opt-in and test it on yourself.
- Authenticate your sending domain.
- Send a welcome email automatically.
- Give people a reason to subscribe.
Each step tells you what we saw on screen during our test and what the official documentation says. We point to the gaps too.
Key Takeaways
Gmail’s sender guidelines require SPF, DKIM and DMARC from anyone who sends 5,000 or more messages a day to personal Gmail accounts (Google, Email sender guidelines). The setup that wins long term is permission first: a form people fill in themselves, a confirmation email, an authenticated domain and a clear reason to join. Buying a list skips all of that, and every platform we checked forbids it.
Step 1: Pick an Email Tool With a Free Plan That Fits Your List
You can start building an email list for free on all three tools we tested: beehiiv’s billing page showed a Free Plan of 2,500 subscribers, Kit’s help center lists a Free plan for up to 10,000 subscribers (Kit, The Kit Free plan), and MailerLite’s covers 250 subscribers and 2,500 emails a month. The headline number is only half of the choice, though.
What else should you check? The parts of the plan your first week depends on: forms, a hosted page and the welcome email.
| Free plan item | beehiiv | Kit | MailerLite |
|---|---|---|---|
| Subscribers | 2,500 (in-app billing page) | Up to 10,000 (help center and pricing page) | 250 (in-app and help center) |
| Monthly emails | Unlimited sends (in-app) | Unlimited broadcasts | 2,500 |
| Forms and landing pages | Subscribe forms; landing pages listed on Free | Unlimited forms and landing pages | 3 forms, 1 landing page |
| Automated welcome | Preset welcome email; automations start at Lite | Confirmation email only; sequences need Creator | 3 automations |
| Own domain needed before going live | No | No | Yes, in our test |
The MailerLite caps come from its plan and billing help article, which lists “3 automations, 3 forms, 1 landing page, 1 website (up to 5 pages), 1 digital product” for Free. Our app showed far bigger numbers, such as 500 forms, but those were trial figures during the 14-day trial. Plan around the Free column, not the trial. Kit’s help center says “Visual automations and sequences stop running while you’re on the Free plan,” and beehiiv’s pricing page lists automations under Lite.
Here’s our rule of thumb for email list building tools. If you have no domain yet, start on beehiiv or Kit, because both let our test signups through without one. If you already own a domain and want a few landing pages, MailerLite works once the DNS step is done. If you plan to sell, Kit’s free plan already includes digital products.
Moving an existing list off Mailchimp instead of starting fresh? Our comparison of free-plan limits for leaving Mailchimp covers the export and the caps. We won’t repeat the full tool reviews here. Our same-day test of three newsletter tools on seven tasks has every cap side by side, and our guide to which email platform fits writers, sellers and designers looks at the same tools through a creator’s to-do list. For the money side, see how MailerLite locks sending past 250 subscribers, how Kit’s free and Creator plans differ and when beehiiv’s Lite plan starts to make sense.
Step 2: Create a Signup Form and Put It on Your Site
A signup form needs one email field and one honest promise, and all three tools gave us embed code in a few clicks: Kit offered 5 embed tabs, beehiiv gave us 1 script snippet, and MailerLite split its code into a site-wide script plus a small block per form. The form itself is the easy part. Deciding what it says takes longer.
How short should the form be? As short as you can make it. Every extra field asks for more trust before you have earned any. A first name is fine if you will really use it in your emails. A phone number on a newsletter form is not.
What should the promise say? Name the topic and the rhythm: “A short email every Friday with one tool we tested this week” beats “Subscribe to our newsletter.” People sign up for a specific benefit, not for the idea of email.
Here is what each tool handed us when we built a form:
- Kit: We picked an inline form and the “Charlotte” template, then got 5 embed tabs: JavaScript, HTML, Share, WordPress and Unbounce. The JavaScript embed is a single line. Share gives you a hosted page with its own link. Our free form carried a “Built with Kit” badge. For more on the builder, see Kit’s form builder and embed options in our review.
- beehiiv: Subscribe forms live under Audience, and the embed is one script snippet, plus an optional script that forwards UTM tags. The forms page warned that these forms “are designed to be embedded on external websites” and “won’t work correctly inside beehiiv website pages.” On a beehiiv site you add a signup block instead.
- MailerLite: We created a form, attached it to a new group, and got a site-wide “MailerLite Universal” script plus a
<div class="ml-embedded">tag for the form. The universal script goes on every page once; each form then needs only its small tag.
Where does the form go on your site? Start with three spots: the end of each blog post, a dedicated subscribe page, and your About page. Readers who reach the end of a post already like your writing, which makes that slot the warmest one you have.
Test the form in a private browser window before you share it. Fill it in with an address you control, then check what the tool shows you. That leads straight into the next step.
Step 3: Turn On Double Opt-In and Confirm It Works
Double opt-in means a new subscriber clicks a confirmation link before you email them, and Gmail’s sender guidelines ask list owners to “Confirm each recipient’s email address before subscribing them” (Google, Email sender guidelines). In our test, Kit had it on by default, MailerLite wouldn’t enable the form without a verified domain, and beehiiv listed our address as Active right after signup, with double opt-in left as a setting to switch on.
Is the extra click worth losing a few signups? For a new list, yes. Confirmation filters out typos, fake addresses and bots before they ever cost you a bounce. beehiiv’s help center explains that “Pending subscribers are excluded from all sends,” so unconfirmed addresses “cannot generate bounces” (beehiiv, Double opt-in and Smart Nudge). A confirmed click is also your best proof that someone asked to join.
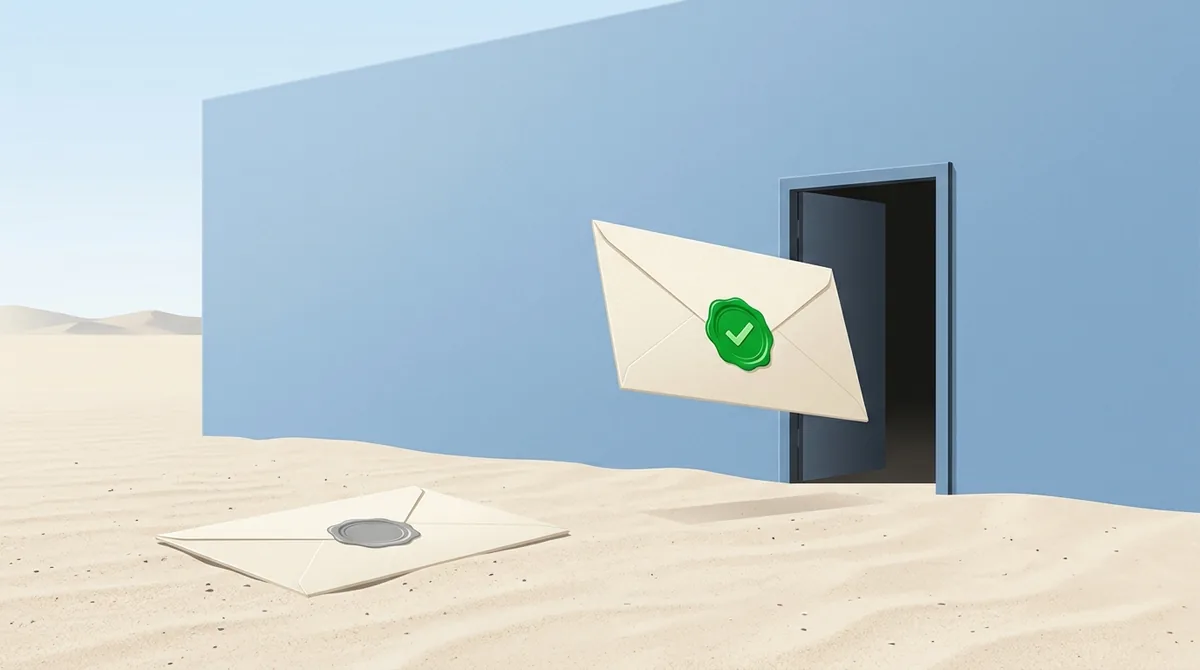
Here’s how each tool handled it.
Kit: on by default
When we subscribed our own address on Kit’s hosted form page, the screen said: “Success! Now check your email to confirm your subscription.” We clicked the link, and the welcome email arrived. Kit’s help center explains the switch behind this: leaving “Auto-confirm new subscribers” unchecked keeps double opt-in on, which Kit calls “highly recommended” (Kit, The Confirmation Email).
One surprise: the Subscribers page still showed “Total subscribers 0” a minute after our confirmed signup. Give the count a few minutes before you assume the form is broken.
MailerLite: on by default, but behind the domain step
MailerLite’s help center says “When you create a form, double opt-in is already enabled by default,” and adds: “While double opt-in is not required by GDPR, we always recommend enabling double opt-in on your forms” (MailerLite, Double opt-in). In our account, the form page showed the catch: “Sender email domain must be authenticated and verified before you can enable this form.” So on MailerLite, Step 3 waits for Step 4. Customizing the confirmation email also needs a paid plan, per the same article.
beehiiv: a switch you turn on
Our beehiiv test signup showed up in the subscriber list as Active, and the welcome email arrived. beehiiv’s help center shows where the setting lives: Settings, then Emails, then the Preset Emails section, where you toggle on Double Opt-in Email. An optional Smart Nudge sends one reminder to people who haven’t confirmed within 48 hours. With double opt-in on, the order becomes “sign up → receive confirmation email → confirm → receive welcome email.”
Whatever tool you use, run the same test we did. Subscribe with your own address, confirm, and check that the welcome email lands. If you see a “press and hold” check or a delay in the counts, note it, because your readers will see the same thing.
Step 4: Authenticate Your Sending Domain
Domain authentication means adding a few DNS records so inboxes can verify that your email tool may send for your domain, and Gmail requires “SPF or DKIM” from all senders and “SPF, DKIM, and DMARC” from bulk senders of 5,000 or more messages a day (Google, Email sender guidelines). This was the step that stopped us cold on MailerLite.
What do those three acronyms do? SPF lists the servers allowed to send for your domain. DKIM adds a signature that proves the message wasn’t changed. DMARC tells receiving servers what to do when a message fails those checks. Google’s page also says that to pass DMARC, “The authenticating domain must be the same domain that appears in the message From: header.”

Do you need this on day one? It depends on the tool:
- MailerLite needs it first. Our form could not be enabled, and our welcome automation showed “Sender email must be authenticated before you can send from this address.” MailerLite’s help center says it is “required to authenticate your domain if you are using a custom domain for sending,” and that you add a DKIM record as a CNAME, an SPF record as a TXT and a domain verification TXT record (MailerLite, Domain authentication). Updates can take up to 24 hours. We didn’t edit DNS during our test, so we stopped there. Our account of what MailerLite let us build before the domain step has the full story.
- Kit sent our welcome email without one. Its help center describes an optional verified sending domain that sets up “SPF, DKIM, and DMARC” with your web host, with an automatic setup through Entri or a manual one using CNAME records (Kit, Verify your domain).
- beehiiv sent our test email from an address at mail.beehiiv.com. Sending from your own domain is a paid-plan feature: beehiiv’s custom domain article is marked “Plan: All Paid Plans” and suggests “Sending from a subdomain (like email.yoursite.com)” to protect your main domain (beehiiv, Custom domain).
Our advice: if you plan to grow past a hobby list, buy the domain early and do the DNS step once. It costs a little and takes an afternoon. If you don’t own one yet, our guide to registering your own domain name walks through the purchase.
Step 5: Send a Welcome Email Automatically
A welcome email should go out the moment someone confirms, and the free plans handle that very differently: beehiiv’s prebuilt welcome went live for us in 1 publish, Kit needed 3 separate pieces during the trial, and MailerLite’s stayed inactive because our sender domain was not authenticated. Pick the version that keeps working after the trial ends.
What survives on Free? On beehiiv, the help center places a preset Welcome Email under Settings, Emails, Preset Emails, while the pricing page lists automations under Lite. On Kit, sequences and visual automations need a paid plan, but the confirmation email stays free, and it can send new subscribers to a URL or a file download after they confirm. On MailerLite, the Free plan allows 3 automations once your domain is authenticated.
Keep the first email short: thank people, repeat what they signed up for, and tell them when the next email arrives. For subject lines and a full sequence, see what to put in a three-email welcome series.
Step 6: Give People a Reason to Subscribe
People subscribe for a specific, believable benefit, and the simplest way to deliver one is through the confirmation step: Kit lets you “upload a file for them to download (such as a freebie or lead magnet), or send them to a URL” (Kit, The Confirmation Email), and beehiiv and MailerLite both let you set your own page after confirmation. We have no conversion-rate data worth quoting here, so the ideas below are principles, not benchmarks.
Which email list building ideas work for a small list? These are the ones we would try first:
- A lead magnet that solves one problem. A checklist, a template or a short guide that matches your newsletter’s topic. Deliver it after confirmation, so the reward also checks the address.
- A content upgrade. Add a bonus to one popular post, such as the spreadsheet behind an article, and offer it in that post’s form.
- A sample issue. Link to a past email so people know what they’re signing up for. Fewer surprises means fewer unsubscribes. No issue yet? Pick a format from our seven newsletter layouts with the blocks to copy and send the first one to yourself.
- A clear schedule. “Every Friday” is a promise. “Occasional updates” is not.
- Recommendations from other newsletters. Kit’s Free plan enrolls you in its Creator Network, so other creators can recommend you, and beehiiv’s pricing page lists a recommendation network on its Free plan.
Want free ways to get email addresses for email marketing? Every honest one is a variation of the list above: give people something useful in exchange, and ask them to sign up themselves. Ask your existing contacts too. A client, a customer or a podcast guest who already knows you is the warmest possible subscriber, as long as they opt in on your form rather than being added by hand.
What should a lead magnet avoid? Bait that has nothing to do with your emails. beehiiv’s Acceptable Use Policy bans incentives “primarily to drive clicks or signups without genuine reader interest” in its Recommendation Network rules, and the same logic applies to any freebie. A list that joined for a prize leaves when the prize is gone.
Where to Place Signup Forms: Site, Social Profiles and Hosted Pages
The best place for a signup form is wherever your readers already are, and if you have no website, a hosted page with its own link does the job: Kit’s Share tab and beehiiv’s hosted subscribe page both took our test signup without any site of our own, while MailerLite’s Free plan allows 1 landing page (MailerLite, Plan and billing). Most people will find you on social media first, so give them a link they can tap.
Which placements should you start with? Use this checklist:
- Social profiles: Put the hosted page link in your bio and pinned post. Most social profiles and podcast show notes have room for one link.
- The end of each post: Readers who finish an article are your most likely subscribers.
- A dedicated subscribe page: One page that explains the newsletter, links a sample issue and holds the form. It doubles as the link you share everywhere else.
- Your About page: People who read it want to know you better.
- Email signatures and talks: Add the link under your name and on your last slide.
Hosted pages come with their own friction. When we subscribed on beehiiv’s hosted subscribe page, a “press and hold” human check appeared first, and our signup arrived with the acquisition source “website: direct / (none).” That check protects your list from bots, but it is one more step for a reader on a phone. For the rest of that setup, including the phone check when you create a beehiiv account, see beehiiv’s hosted subscribe page and phone check in our test.
Should you use pop-ups? Use them carefully. Gmail’s guidelines tell senders to “Avoid opt-in forms that are checked by default and that automatically subscribe users,” so any checkbox on a pop-up or checkout page should start empty.
Why Buying an Email List Backfires
Buying an email list breaks the rules of every email tool we tested and goes against Gmail’s own guidance, which says plainly: “Don’t purchase email addresses from other companies” (Google, Email sender guidelines). That holds for a list sold by profession or by ZIP code just as much as for a generic one.
Search for an email list of architects or an email list of contractors and you will find vendors offering exactly that. Why not take the shortcut? Because the tool you send from will not accept it:
- Kit lists “Purchased subscriber lists, scraped lists, or any other form of non-permission based list collection” as inappropriate use and requires “proof of permission for each Subscriber on their list” (Kit, Acceptable Use Policy).
- beehiiv says purchased lists do not meet its consent rules “even if marketed as “opt-in” or “consented.” Consent is not transferable” (beehiiv, Acceptable Use Policy). Before an import, you confirm that everyone “knowingly consented and opted in” (beehiiv, Importing subscribers).
- MailerLite bans any address “You bought, loaned, rented or in any way acquired from a third party, no matter what they claim about quality or permission,” and may suspend accounts with spam complaints above 0.2% or bounces above 5% (MailerLite, Anti-Spam Policy).
The law adds its own risks. In the US, the FTC’s CAN-SPAM guide says “The law makes no exception for business-to-business email,” and each separate email in violation is “subject to penalties of up to $53,088” (FTC, CAN-SPAM Act: A Compliance Guide for Business). The rules themselves cover your sender details, subject lines, a postal address and opt-outs, which you must honor “within 10 business days.” So a B2B email list built from purchased data still has to follow all of them.
If any of your readers live in the EU, consent has a stricter meaning. The European Commission lists the conditions: consent must be freely given, informed, given for a specific purpose and given “via an affirmative act,” such as a tick-box the person has to check, and “It is for the company/organisation to demonstrate that the individual has consented” (European Commission, Legal grounds for processing data). A bought list gives you no such proof. This is general information, not legal advice; check the rules that apply to your audience.
What about the practical cost? Strangers don’t open, they mark you as spam, and Gmail’s sender guidelines ask senders to keep reported spam rates “below 0.10%” and avoid ever reaching 0.30%. A few hundred bought addresses can sink the reputation of a domain you spent months building.
Email List Building Services, Courses and Tools: Do You Need Them?
Most new lists need no paid service: the three free plans we tested cover forms, a hosted page and a first email, and the FTC warns that even if you hire a company for your email marketing, “you can’t contract away your legal responsibility to comply with the law” (FTC, CAN-SPAM guide). This section is our judgment, not a ranking of providers.
When does an email list building service or agency make sense? When you have traffic but no time, or when you need a landing page, a lead magnet and an ad campaign built together. Ask any agency three questions before you sign:
- Where will the subscribers come from? The answer should be your site, your content or ads that point to your form, never “our database.”
- Who owns the list? It should live in your account, on a tool you can log in to.
- How do they record consent? Ask for the signup source and timestamp for each subscriber, the same proof of consent beehiiv’s policy says it may request.
Is an email list building course worth buying? A good course saves time if it teaches a process you’ll repeat: picking a lead magnet, writing a landing page, measuring signups by source. Skip any course that sells list growth through scraping, purchased data or “done-for-you” contact lists, because that advice breaks every platform policy quoted on this page.
Free email list building software is easy to find, and the tools in Step 1 already include it. Extra tools such as pop-up builders or quiz makers help later, when you know which page brings the most signups. Until then, the form, the hosted page and the confirmation email are enough.
Your First Week: A Checklist for a New Email List
You can finish this whole setup in one week, and the order matters more than the tool: in our test, a missing domain blocked 1 of 3 platforms from putting a form live. Work through the list in this order and test each step on yourself.

- Day 1: Pick a tool whose free plan covers your first months, and sign up.
- Day 2: Write the one-sentence promise and build one form.
- Day 3: Turn on double opt-in, subscribe yourself and confirm.
- Day 4: Authenticate your sending domain, or note when you will.
- Day 5: Write the welcome email and test it on yourself.
- Day 6: Create one lead magnet or sample issue.
- Day 7: Add the form to your posts, your bio link and your About page.
Then wait, watch where signups come from, and improve the page that works. If most of them come from blog posts, more search traffic means more signups, and our blog SEO starter plan for small sites covers that side. Why rush past that? Building email lists is slow at first, and the habits you set in week one decide whether the list stays clean at 1,000 subscribers. Keep your list exportable, keep every address one that asked to join, and the rest is consistent writing.
References
- Google: Email sender guidelines
- FTC: CAN-SPAM Act: A Compliance Guide for Business
- European Commission: Legal grounds for processing data
- Kit: The Kit Free plan
- Kit: The Confirmation Email
- Kit: Verify your domain to optimize your deliverability
- Kit: Acceptable Use Policy
- beehiiv: Pricing
- beehiiv: Double opt-in and Smart Nudge
- beehiiv: How to use a custom domain for your publication
- beehiiv: How to import free subscribers
- beehiiv: Acceptable Use Policy
- MailerLite: Plan and billing
- MailerLite: How to use double opt-in when collecting subscribers
- MailerLite: Domain authentication
- MailerLite: Anti-Spam Policy